

 Tiếng Việt
Sewing mini handmade bags has become a creative trend loved by millions of people — especially those just beginning their sewing journey. No expensive sewing machine required, no advanced skills needed. With just a few pieces of fabric, needle and thread, and a little patience, you can create charming, one-of-a-kind bags to use yourself or give as heartfelt gifts.
This article walks you through 3 simple mini bag styles from A to Z — complete with helpful tips and advanced techniques to make your finished pieces both beautiful and durable. With years of hands-on experience manufacturing handbags, backpacks, canvas bags, and non-woven fabric bags, the expert team at May Hop Phat is here to guide you every step of the way.
💡 Tip from Hop Phat: If you need bags made in bulk, with branded logos, or custom designs — contact us today or call 📞 (+84) 909 938 333 for a free consultation and the best quote!
🧶 I. Materials & Tools to Prepare Before You Start Sewing
Before diving into how to sew a mini handmade bag, proper preparation of materials and tools accounts for roughly 50% of your final product’s success. Here is everything you need to get started on the right foot.
1. 🎨 Basic Materials You Need
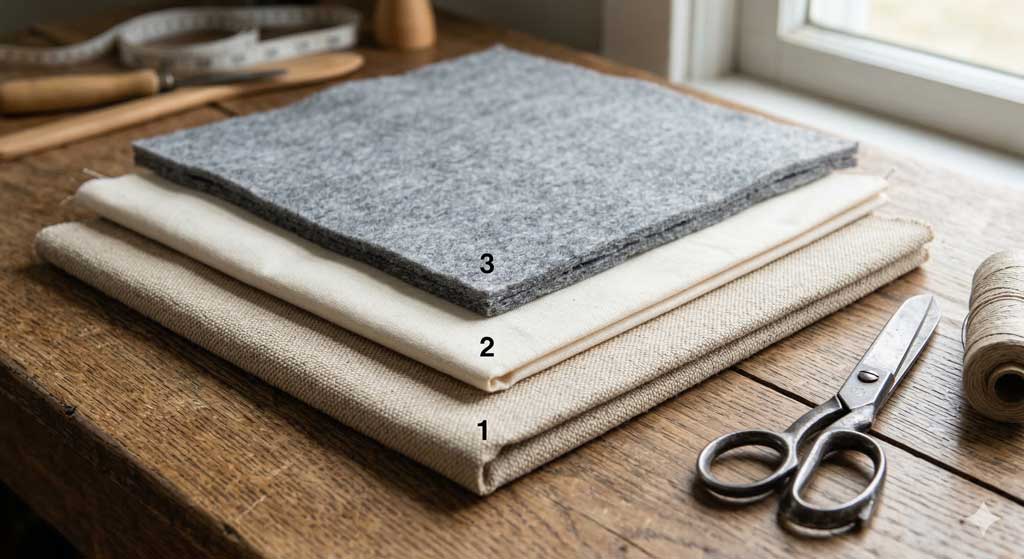
To begin your mini handmade bag journey, gather the following materials:
Fabric options for each bag style:
- 🟦 Canvas fabric: Thick, durable, easy to sew, and holds its shape well — ideal for everyday carry bags
- 🌸 Cotton fabric: Soft, breathable, and absorbent — perfect for cosmetic pouches or small accessory bags
- 🧸 Felt fabric: Warm, available in a wide range of colors, easy to cut without fraying — ideal for decorative bags and mini keychains
📊 Fabric comparison table for mini handmade bags:
| Fabric Type | ✅ Pros | ⚠️ Cons | 🎯 Best For |
|---|---|---|---|
| Canvas | Durable, holds shape well, lightly water-resistant | Slightly stiff, harder to hand-sew | Everyday carry bags |
| Cotton | Soft, breathable, wide variety of prints | Wrinkles easily, less durable than canvas | Cosmetic pouches, accessories |
| Felt | Warm, colorful, no fraying edges | May pill over time | Decorative bags, keychains |
Thread & color selection: Choose thread that either matches or contrasts with your fabric to create visual interest. Polyester thread is more durable, while cotton thread is softer and more natural — choose based on your intended use.
Essential accessories you cannot go without:
- 🔒 Mini zipper (3–15cm depending on the design)
- 🪢 Cotton drawstring cord or paracord
- 🔘 Metal or plastic snap buttons
- 🏷️ A handmade label to sign your creation
2. ✂️ Essential Sewing Tools

Your basic toolkit should include:
- 🪡 Sewing needles: Size 9–11 for regular fabric; size 14–16 for thicker fabrics like canvas and felt
- ✂️ Fabric scissors: Must be sharp enough for a clean cut with no fraying
- 📏 Ruler: A 30cm metal ruler or flexible measuring tape
- ✏️ Fabric marking pen: A fabric pencil or tailor’s chalk that disappears after sewing
- 📌 Straight pins: To hold fabric layers in place while sewing
- 🗂️ Cutting mat: Protects your work surface and helps you cut fabric accurately
🌟 Pro tip from May Hop Phat: Investing in a quality set of tools will make a noticeable difference in the beauty and durability of your finished bags. Don’t cut corners here — good tools are your silent teachers!
3. 🛒 Tips for Buying Materials on a Budget
Where to shop for reliable supplies:
- 🏪 Traditional fabric markets: Affordable prices, and you can feel and inspect the fabric in person before buying
- 🧵 Haberdashery & sewing supply stores: Wide variety, consistent quality you can count on
- 💻 Online shopping: Convenient, but always check actual color photos carefully and read product reviews
📐 How to calculate fabric quantity: For a mini bag measuring 10×12cm, you only need around 0.3 metres of fabric. However, it is wise to buy 20% extra to account for cutting mistakes or trying out new styles.
🎁 Need fabric bags made in bulk for events or corporate gifting? 👉 Contact Hop Phat now! — ☎️ (+84) 909 938 333
👜 II. Style 1 — Simple Mini Drawstring Bag: Perfect for Absolute Beginners

The mini drawstring bag is the ideal starting point for anyone learning how to sew a mini bag. It is the simplest of the three styles, yet incredibly practical and easy to customise to your personal taste.
1. 📐 Design & Standard Dimensions
A mini drawstring bag is great for storing:
- 🎧 Earphones, charging cables, and mini power banks
- 💍 Small jewellery — rings, earrings, and delicate chains
- 🌸 Wardrobe sachets to keep clothes smelling fresh
- 🎀 Handmade gifts for friends and loved ones
📏 Standard finished size: 10cm × 12cm (not including the drawstring portion)
2. ✂️ Step-by-Step Fabric Cutting Guide
Preparing your pattern:
- Draw a rectangle measuring 12cm × 16cm on a piece of card stock
- Add a 1cm seam allowance around all edges
- Pin the pattern securely onto your fabric
- Trace the cutting line with a fabric marking pen, then cut cleanly in one firm motion
Proper fabric cutting technique:
- Use sharp scissors and cut in one confident stroke — multiple short cuts tend to leave jagged edges
- Keep the fabric flat and taut while cutting so it does not shift or pucker
- Cut 2 identical pieces (plus 2 lining pieces in a different fabric if you want extra structure)
3. 🪡 Detailed 5-Step Sewing Process
- Step 1 — Arrange the fabric: Place the two fabric pieces together with their right sides facing inward, aligning all edges evenly. Pin along 3 sides, leaving the top edge open for the bag opening.
- Step 2 — Sew the bag body: Stitch a straight seam 1cm from the edge along all 3 pinned sides. Keep your stitching even and secure — this forms the structure of the bag.
- Step 3 — Create the drawstring channel: Fold the top edge down by 2cm and press flat with an iron. Sew two parallel lines of stitching — one 0.5cm and one 1.5cm from the folded edge — to form the drawstring casing.
- Step 4 — Thread the cord: Use a large needle or a thin bamboo skewer to feed the drawstring cord through the channel. Tie a secure knot at each end so the cord cannot slip out.
- Step 5 — Check and finish: Turn the bag right-side out and test the drawstring to make sure it opens and closes smoothly. Press lightly with an iron for a neat, polished finish.
⚠️ Common mistakes and how to fix them:
- ❌ Curved seams: Caused by not keeping the fabric flat while sewing — always draw a guideline first
- ❌ Drawstring getting stuck: The channel is too narrow — ensure the casing is at least twice the diameter of your cord
- ❌ Lopsided bag: Edges were not aligned properly at the start — always measure and pin carefully before you sew
✨ Need mini drawstring bags printed with your logo for events or promotions? 👉 Call Hop Phat now! — ☎️ (+84) 909 938 333
👛 III. Style 2 — Mini Zipper Pouch: More Professional & Practical

The mini zipper pouch takes your handmade mini bag sewing skills up a notch. With a secure zipper closure, this style looks polished enough to rival store-bought products — and it is the perfect next challenge once you have mastered the drawstring bag.
1. 🎯 Features & Practical Uses
A mini zipper pouch is perfect for storing:
- 💳 Coins, ATM cards, and name cards
- 💄 Lipstick, mini moisturiser, and lip gloss
- 🎮 A cute mini wallet for children
- 🎁 As an insert inside a larger gift box
📏 Ideal finished size: 8cm × 10cm
2. 🔒 Preparation Details for the Zipper Pouch
Choosing the right zipper:
- 🟢 Nylon zipper: Lightweight, flexible, and smooth — the best choice for lightweight fabrics
- 🔵 Metal zipper: More durable and gives an upscale look, but slightly heavier
- 📏 Zipper length: 8–10cm works well for this pouch size
Fabric dimensions (including 0.5cm seam allowance on all sides):
- Front panel: 9cm × 11cm
- Back panel: 9cm × 11cm
3. Step-by-Step Sewing Instructions
- Step 1 — Attach the zipper: Place the zipper face down along the top edge of the fabric (with the wrong side of the fabric facing up). Sew it in place with a straight line of stitching. This is the most important step — take your time and go slowly for a straight, even seam.
- Step 2 — Sew the pouch body: Place the two fabric panels together with right sides facing each other and sew along the remaining 3 sides. Important: Leave the zipper halfway open before sewing so you can turn the pouch right-side out afterwards.
- Step 3 — Shape the corners: Pull each bottom corner into a triangle shape and sew across 1cm from the tip. Trim away the excess fabric. This step gives the pouch a flat base and a fuller, more professional look.
- Step 4 — Finish & inspect: Turn the pouch right-side out through the zipper opening. Test the zipper by opening and closing it several times. Press all seams flat with an iron for a crisp, neat result.
🛍️ Need zipper pouches with custom branding made in bulk? 👉 Contact Hop Phat for a free consultation! — ☎️ (+84) 909 938 333
🤲 IV. Style 3 — Mini Bag Without a Sewing Machine: Create Anywhere, Anytime

No sewing machine? No problem! Sewing a mini handmade bag by hand is not only budget-friendly but also a wonderfully meditative creative experience. Hand-stitched bags carry a special charm all their own — rustic, warm, and full of personal character.
1. 💚 The Standout Advantages of Hand Sewing
- 💰 Cost-effective — no need to invest in a sewing machine
- 🧘 Stress-relieving — the focused, repetitive nature of hand stitching is genuinely calming
- 🌍 Ultimate creative freedom — sew anywhere, anytime: at home, travelling, or waiting in a café
- 💝 Durable and beautiful results when done with the right technique and quality thread
2. Basic Hand-Stitching Techniques to Master
3 essential stitches every beginner needs:
- 🔵 Running stitch: Quick and strong — ideal for sewing the main body of the bag and load-bearing seams
- 🟢 Backstitch: Produces a neat, sturdy line — use it for the bag’s outer edges and decorative details
- 🟡 Slip stitch (invisible stitch): No visible thread from the outside — perfect for closing the bag opening or attaching an inner lining
Tips for keeping your hand-stitching straight:
- 📏 Always measure an even distance from the fabric edge using a ruler
- ✏️ Draw a guideline with a fabric marking pen before you begin stitching
- 🐢 Stitch slowly and steadily — rushing leads to uneven seams
- 📌 Pin the layers together first to prevent the fabric from shifting
3. 📋 Step-by-Step Instructions
- Step 1 — Cut and prepare the fabric: Cut 2 rectangular pieces of fabric measuring 9cm × 12cm. For a thicker, softer feel, add a thin inner layer of felt between the two panels. Draw a guideline 0.7cm from each edge using a fabric pen.
- Step 2 — Stitch along the guideline: Starting from one corner, stitch along your marked lines across 3 sides. Keep each stitch 2–3mm apart to ensure the seam is strong enough. Pull the thread with consistent tension — not too tight, not too loose.
- Step 3 — Shape and finish: Once all 3 sides are stitched, turn the bag right-side out. Use the tip of a ballpoint pen or a thin bamboo skewer to gently push out all 4 corners so they are sharp and even.
- Step 4 — Decorate and personalise: This is the most fun part! Add special finishing touches such as:
- ✨ Embroidering a name, initials, or a favourite small motif
- 🌸 Attaching decorative buttons, beads, or small gemstones
- 🎀 Adding a mini strap, silk ribbon, or a small bell
🌈 Creative idea from May Hop Phat: Try using thread that contrasts with your fabric — for example, yellow thread on navy blue fabric, or red thread on cream white — to create a striking accent that makes your handmade bag truly unique!
🎨 Have a bag design you love and need it produced in bulk? 👉 Send your request to Hop Phat now! — ☎️ (+84) 909 938 333
⭐ V. Pro Tips & Advanced Techniques for Even More Beautiful Mini Bags
1. 🎨 How to Decorate Your Mini Bag in a Unique, Eye-Catching Way
Simple embroidery ideas — even if you have never embroidered before:
- ❤️ Embroider a small heart at the corner of the bag
- 🌿 Add a coloured border stitch running along the top edge
- ✏️ Stitch the recipient’s initials — an incredibly personal and meaningful gift touch!
Creative accessories to suit every style:
- 🪵 Natural wooden buttons: Creates a rustic, vintage aesthetic
- 🔔 Small bells: Adds a playful, cheerful sound with every use
- 🎀 Silk ribbon: Brings an elegant, feminine quality to the bag
2. 🧼 Washing & Caring for Your Mini Handmade Bag So It Lasts
How to wash a fabric bag the right way:
- 💧 Soak in cold water with a small amount of mild soap (never use hot water)
- 🤲 Gently hand wash — do not wring or twist the bag
- 🌬️ Air dry in a shaded, well-ventilated area away from direct sunlight to prevent colour fading
- 🚫 Never use a tumble dryer — high heat will cause the fabric to shrink and lose its shape
Proper storage when not in use:
- 🗂️ Store inside a breathable fabric pouch or a paper box
- 🎨 Keep away from dark-coloured items that could transfer dye
- ☀️ Occasionally air out in gentle sunlight for 15–20 minutes to naturally freshen and sanitise
3. 🔄 Creative Variations from the 3 Basic Styles
Adjust the size to suit your needs:
- 📦 Super mini 5×7cm: Perfect for pills, sweets, or the tiniest jewellery pieces
- 💄 Medium 12×15cm: Holds everyday cosmetic essentials and work accessories
- 📁 Large 15×20cm: Great for small documents or a 7-inch tablet
Mixing multiple fabric colours in one bag:
Don’t be afraid to experiment! For example: a navy blue front, cream white back, and mustard yellow edging — a bold combination that will produce a completely one-of-a-kind mini handmade bag that no one else will have.
🧵 Have a unique bag concept and need a reliable manufacturer to bring it to life? 👉 Hop Phat is ready to make your vision a reality! — ☎️ (+84) 909 938 333
🏭 VI. Need Bags Made in Bulk? Trust May Hop Phat — Ho Chi Minh City’s Leading Manufacturer

Learning how to sew mini handmade bags at home is a wonderful creative outlet, and the results make beautiful personal gifts. But when you need bags produced in large quantities — for events, corporate gifting, online retail, or custom-designed orders — May Hop Phat is the trusted partner you have been looking for.
Hop Phat Backpack & Bag Manufacturing Co., Ltd. is one of the most reputable names in the production of backpacks, handbags, non-woven fabric bags, canvas bags, and burlap bags — trusted by a wide base of individual customers, businesses, and schools. Built and grown on a foundation of customer trust, Hop Phat always puts product quality and fair, competitive pricing above all else in every order it fulfills.
🌟 Why customers keep choosing May Hop Phat:
- ✅ Carefully sourced fabric materials — fade-resistant, safe, and meeting quality standards
- ✅ Strong, precise stitching on every single detail — with rigorous quality control at every stage
- ✅ 100% custom orders accepted — any size, colour, brand logo, or style
- ✅ Most competitive pricing on the market — suitable for both small individual orders and large bulk runs
- ✅ Clear warranty policy with dedicated, professional after-sales support
- ✅ Long-term partner of schools, businesses, and major brands across Ho Chi Minh City
- ✅ 3 large-scale production facilities in Binh Tan, Hoc Mon, and Di An — ensuring on-time delivery every time
🏆 “Hop Phat is recognised as a company built and developed on the foundation of customer trust. We always put product quality and affordable pricing first — that is our unwavering commitment to every partner.”
👉 Contact us today to receive a free consultation and the best possible quote:
🌐 Website: https://mayhopphat.com
📞 Hotline: (+84) 909 938 333
📧 Email: info.mayhopphat@gmail.com
📍 Address: No. 46, Street No. 3, Quarter 6, Binh Hung Hoa Ward, Binh Tan District, Ho Chi Minh City
✨ Conclusion — Start Your Creative Journey Today!

The expert team at May Hop Phat has shared a complete guide — from the very basics to more advanced techniques — on how to sew a mini handmade bag, covering 3 adorable styles suited to every skill level:
- 🟢 Mini drawstring bag — the simplest style, absolutely perfect for complete beginners
- 🔵 Mini zipper pouch — more polished and practical for everyday life
- 🟡 Hand-stitched mini bag — no sewing machine needed, with total creative flexibility anywhere and anytime
Whichever style you choose, the most important thing is to start today — because every bag you create is a valuable learning experience. Practice, experiment, and never be afraid to express your own personal style!
And if you need custom-made handbags, backpacks, or any fabric products in large quantities — do not hesitate to reach out to May Hop Phat. We are always ready to be your partner in bringing great ideas to life.
📞 Call now: (+84) 909 938 333 | 💬 👉 Send us a message here
📚 Related articles:
- ➡️ How to sew a simple insulated water bottle bag at home
- ➡️ Custom handbag manufacturing — May Hop Phat
- ➡️ Bulk canvas bag manufacturing with logo printing
- ➡️ Affordable backpack factory in Ho Chi Minh City — Hop Phat