

 Tiếng Việt
Learning how to sew a lunch bag at home helps you save costs and create unique products according to personal preferences. With a few pieces of fabric and basic sewing tools, you can make a quality insulated bag that is safe and hygienic for the whole family. By mastering the basic techniques below, you’ll have a bag that keeps food warm for 4-5 hours, perfect for office lunches.
1. Significant Cost Savings
Sewing your own lunch bag offers clear economic benefits. A quality lunch box bag on the market costs from 150,000-500,000 VND, while sewing materials only cost about 50,000-80,000 VND.
You can utilize leftover fabric from previous sewing projects or recycle old clothes that are no longer in use. This not only saves money but is also environmentally friendly. May Hop Phat encourages fabric upcycling to create useful products.
2. Customization According to Personal Needs
When sewing your own lunch bag, you have complete control over the bag size suitable for your bento box or office lunch box. Handmade bag design can reflect personal style through fabric colors and decorative patterns.
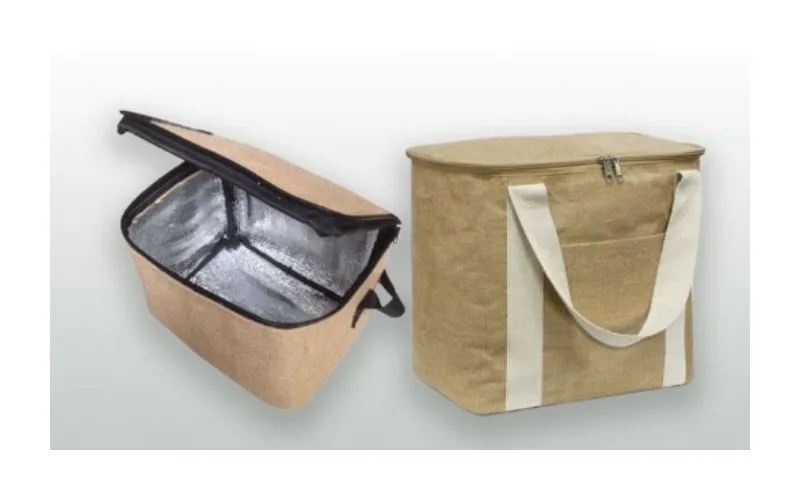
Many people prefer lunch bags with side pockets to hold chopsticks, spoons, or Japanese-style lunch bags with multiple compartments. Customizing the bag according to actual usage needs provides a much better experience than mass-produced products.
3. Quality Control
Choosing quality sewing fabric ensures superior lunch bag durability. You can use thick cotton fabric, canvas fabric, or insulated fabric depending on the purpose of use. Strong stitching done by your own hands is often more durable than mass-produced products.
II. Necessary Materials for Sewing a Lunch Bag
1. Choosing Suitable Fabric
| Fabric Type | Characteristics | Suitable For | Price |
|---|---|---|---|
| Canvas Fabric | Thick, durable, water-resistant | Daily lunch bags | 25,000-40,000/m |
| Cotton Fabric | Soft, easy to wash | Light lunch bags | 15,000-30,000/m |
| Insulated Fabric | Good heat retention | Insulated lunch bags | 45,000-80,000/m |
| Denim Fabric | Extremely durable, stylish | Fashionable lunch bags | 30,000-50,000/m |
Canvas fabric is the optimal choice for self-sewn lunch bags thanks to moderate thickness and good load-bearing capacity. Cotton fabric suits those who prefer natural materials and easy bag maintenance. If you need an insulated bag, choose specialized insulated fabric or combine with an insulated lining.
2. Required Accessories and Tools
Basic sewing tools include:
- Sewing needles and thread (choose thread matching fabric color)
- Home sewing machine or hand sewing needles
- Sharp fabric scissors
- Measuring tape and ruler
- Tailor’s chalk for marking
- Fabric pins for securing

Bag accessories include:
- Sturdy zipper (15-20cm)
- Drawstring or cord
- Handles (can be self-sewn)
- Snap buttons or velcro
3. Calculating Required Fabric Amount
Fabric calculation formula for lunch box bag:
- Fabric length = (Box length + 5cm) x 2 + 10cm
- Fabric width = Box width + Box height x 2 + 10cm
Example: 20x15x8cm lunch box needs approximately 50x40cm fabric. Should reserve an extra 20% fabric to account for errors and sewing handles.
See also:
– Guide to sewing insulated bottle bags with insulated lining and snug design, you’ll create the perfect protective bag for insulated bottles.
III. 7 Steps to Complete Lunch Bag Sewing from A to Z
1. Designing and Cutting Patterns
Measuring lunch box dimensions accurately is the first important step. Drawing patterns on paper before transferring patterns to fabric helps avoid mistakes. May Hop Phat recommends drawing a detailed fabric cutting diagram including bag body, bag bottom, and handles.
Accurate fabric cutting tip: Always keep the wrong side of fabric facing up when cutting, use tailor’s chalk instead of ballpoint pen for marking.
2. Cutting Fabric Details
List of details to cut:
- Front bag body: 1 piece
- Back bag body: 1 piece
- Two side panels: 2 pieces
- Bag bottom: 1 piece
- Handles: 2 fabric strips 60x5cm
- Lining: Optional
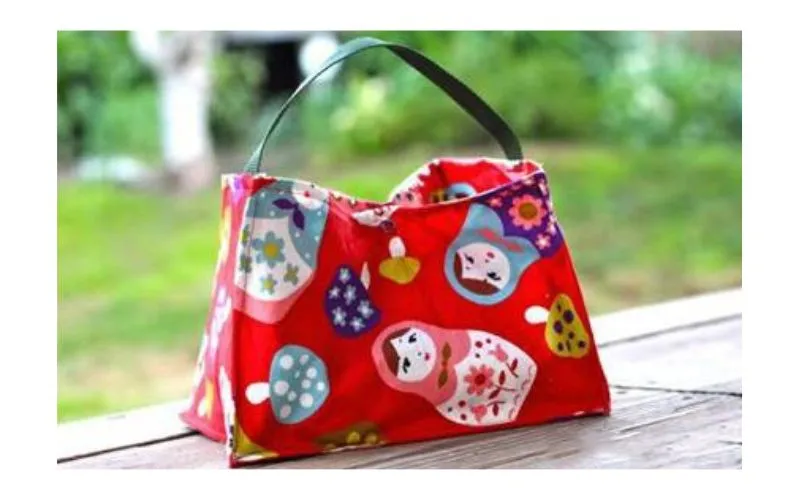
Check dimensions of each detail after cutting to ensure symmetry. Cut an extra 1cm for seam allowance on each edge.
3. Sewing the Bag Body
Pin and sew the 4 sides of the bag body in order: front-side-back-side. Right-angle sewing technique requires trimming excess fabric at corners to avoid bulkiness. Seam line 1cm from fabric edge, sew twice to increase sturdiness.
Handle raw edges with zigzag stitch or serging to prevent thread unraveling when washing the bag.
4. Creating Bag Bottom and Depth
How to create a flat bag bottom: Fold the bottom corner into a triangle shape, sew horizontally 3-4cm from the tip. Bag depth depends on this sewing distance – the farther from the tip, the deeper the bag.
Secure the bottom with even stitches, check bag shape by turning it right side out.
5. Attaching Zipper or Creating Bag Opening
Standard zipper attachment method:
- Place zipper face down on right side of fabric
- Pin to secure before sewing
- Sew close to zipper teeth to ensure smooth operation

Alternatively, you can create a drawstring bag opening by folding the bag edge 3cm, sewing to form a channel to thread the cord.
6. Sewing and Attaching Handles
How to sew sturdy handles:
- Fold fabric strip in half lengthwise
- Sew 0.5cm from edge
- Turn right side out and topstitch both sides
Handle attachment position 5-6cm from bag edge, handle length approximately 50-60cm for handheld bags or 80-100cm for shoulder bags.
7. Finishing and Quality Checking
The final step in this process is checking insulated bag quality by trimming excess threads thoroughly, checking sturdiness of seams by pulling gently. Turn bag right side out and test with actual lunch box to ensure proper fit.
IV. Tips to Make Lunch Bags More Durable and Beautiful
1. How to Increase Heat Retention
Adding an insulated lining between outer fabric and inner fabric will increase heat retention efficiency. Silver aluminum fabric or insulated foam are good choices. Airtight sewing by closing the bag opening tightly also helps maintain temperature of food.
2. Decorating and Personalizing the Bag
Embroidering names or favorite patterns on the bag creates a personal touch. Attaching colored buttons, decorative cords, or printing images on fabric are all simple yet effective ways to customize the bag.
3. Proper Storage and Use
Proper bag washing: Turn inside out, wash in cold water, dry in a well-ventilated area. Store in a dry cabinet when not in use. Repair any small defects immediately to extend bag lifespan.
With the how to sew a lunch bag at home guide shared, you can confidently create high-quality products. Each packed meal will be safer and keep warm better. May Hop Phat hopes this detailed guide will help you create satisfying lunch bags, save costs, and express your personality. Start your first bag sewing project today and share your handmade results with the DIY-loving community!