

 Tiếng Việt
How to Sew a Drawstring Backpack as Beautiful as Store-Bought — Simple Steps at Home
Affordable drawstring backpacks are taking the market by storm right now. At first glance, how to sew a drawstring backpack may seem simple and not difficult at all. That’s why some people have already tried making their own drawstring backpacks in their own personal style — saving a considerable amount of money in the process.
However, not everyone knows how to sew a drawstring backpack. In reality, it’s not difficult at all. You just need to prepare your materials thoroughly, then follow the detailed step-by-step guide on how to sew a drawstring backpack as beautiful as a store-bought one, shared by May Hop Phat below. Even if you are extremely inexperienced at sewing, you can still complete a beautiful drawstring backpack in your own unique way. Let’s take a look and get started!
5 Outstanding Advantages of Drawstring Backpacks You Should Know
Drawstring backpacks have many advantages that other backpack styles simply don’t have. Perhaps that’s why this product line has become increasingly popular among young people in recent years. You’d be hard-pressed not to spot them out on the street. So what are the most outstanding advantages of this product? They are:
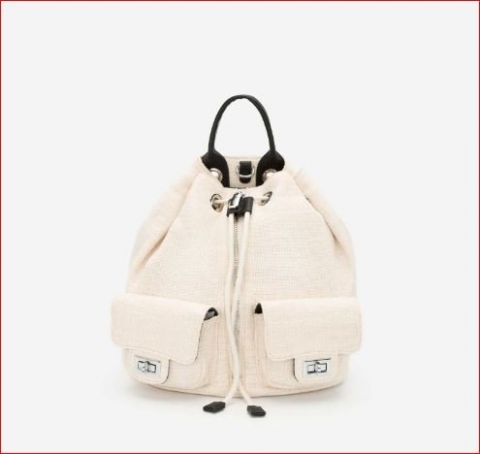
- Compact, lightweight, and stylish — perfect for active and dynamic young people. This is the first advantage worth highlighting.
- The price of this product line is quite affordable.
- Anyone can sew their own beautiful drawstring backpack because the materials are easy to find — and how to sew a drawstring backpack can be done right at home.
- Since they are made from fabric, the patterns, designs, and colors of drawstring backpacks are rich and diverse.
- You can also unleash your creativity by painting unique patterns or illustrations on the bag — especially if your backpack is made from plain fabric.
What Do You Need to Prepare to Sew a Drawstring Backpack?
Drawstring backpacks are extremely popular with young people because they bring a dynamic and modern look. If you want to sew your own drawstring backpack but aren’t sure what to prepare, don’t worry. Here are the materials you need:
- 1 piece of colored or patterned fabric (choose any color or pattern you like)
- 1 piece of white fabric (for the lining)
- 1 length of paracord / drawstring rope
- A sewing machine, needles, thread, and scissors
- Acrylic paint and a paintbrush
How to Sew a Drawstring Backpack as Beautiful as Store-Bought — Simple Steps at Home
Once you have everything prepared, let’s get started and sew the drawstring backpack step by step:
Step 1
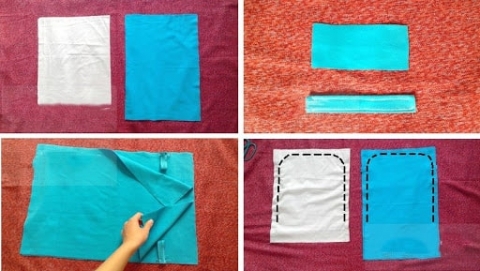
To make a drawstring backpack, the first thing you need to do is cut the colored fabric for the outer front panel, and cut the white fabric for the inner lining at the same time. Pay close attention to the following measurements when cutting:
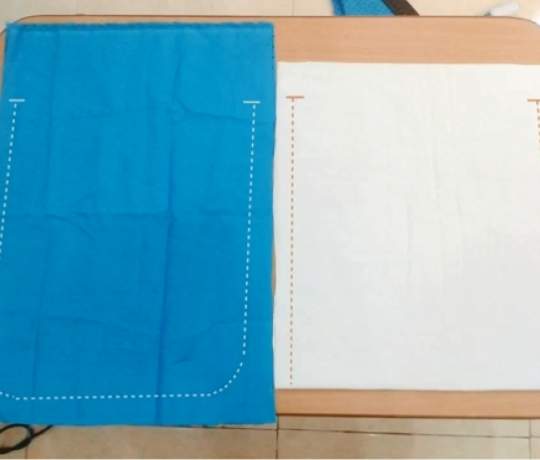
- Cut the colored fabric to a size of 35 x 50 cm.
- Cut the white lining fabric slightly smaller — approximately 35 x 45 cm.
Each fabric type (colored and white) must be cut into 2 pieces of equal size.
Step 2

Next, cut 2 additional pieces of colored fabric to serve as the strap loop attachments on the backpack. Each piece should measure approximately 6 x 12 cm. Fold the horizontal edges of each piece inward, then use a sewing machine to stitch them in place securely.
Step 3
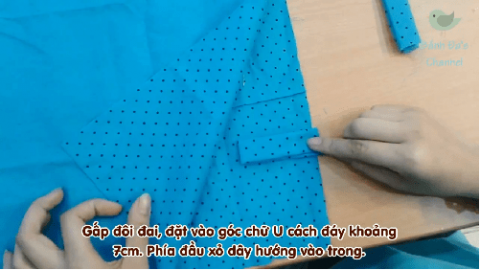
Take the 2 colored fabric pieces cut in Step 1. Fold each one in half, then use pins to temporarily secure both long sides. However, make sure to leave approximately 7 cm from the bottom of the backpack unstitched.
Step 4
In this step, use the sewing machine to stitch both the colored fabric pieces and the white lining along a U-shaped seam. Note: only stitch up to approximately 10 cm from the opening on the colored fabric, and 5 cm from the opening on the white fabric.
Step 5
Turn the colored fabric right-side out to its main face. Then, insert the stitched white fabric piece inside the colored fabric to serve as the lining for your backpack.
Step 6
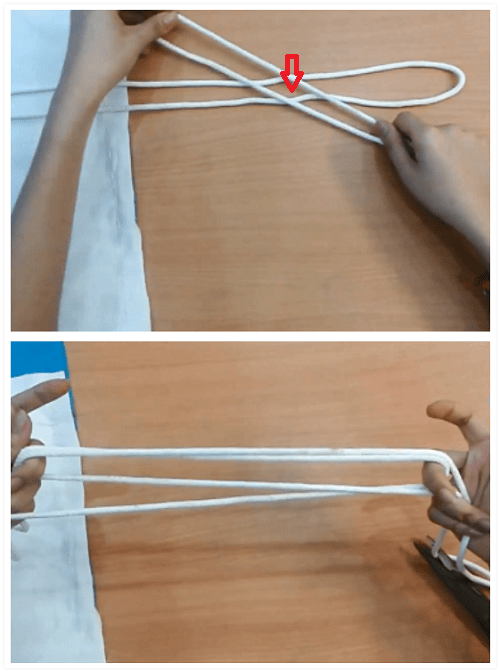
Next, cut 2 pieces of paracord of equal length to use as the backpack straps. Before cutting, hold the cord up against your body to determine the right length — this helps avoid straps that are too long or too short. Once cut, fold each cord in half and weave the 2 cords through each other in opposite directions at the top opening of the drawstring backpack.
Step 7

On the first side of the backpack, fold the opening edge inward twice to conceal the paracord inside, then use pins to hold it in place temporarily. For a neat and even fold, make sure both sides are folded evenly with equal spacing. Then use the sewing machine to sew along the pinned line. Once finished sewing, simply remove all the pins.
Step 8
Repeat the same process on the opening of the other side of the backpack.
Step 9

At this point, you’re almost done! In this step, try pulling the drawstring to test whether it opens and closes properly. If the backpack can be opened and closed just like the ones sold in stores, proceed to the final step to complete your drawstring backpack.
Step 10
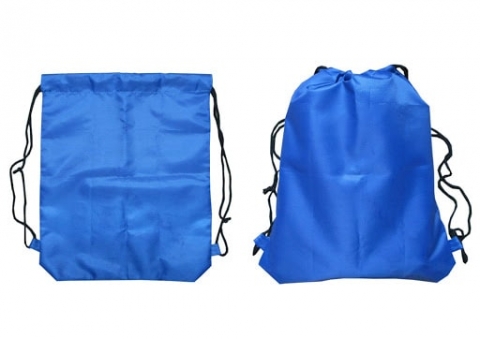
This is the final step in how to sew a drawstring backpack. All you need to do is thread the paracord through the fabric loops you sewed earlier, create strap hooks at the bottom of the bag, and tie them tightly in a firm knot — and you’re done!
Step 11

If you want your drawstring backpack to be even more impressive and unique, you can use paint and a brush to add your own creative patterns and illustrations to it — turning it into a truly one-of-a-kind backpack that is 100% yours. See? How to sew a drawstring backpack is really quite easy, isn’t it?
Closing Words
Above is the simplest and most straightforward guide on how to sew a drawstring backpack at home. It doesn’t take much time, and the materials needed are easy to find. You can do it right at home without any obstacles. We hope this guide has helped you create your very own custom backpack exactly the way you want it. Good luck!