

 Tiếng Việt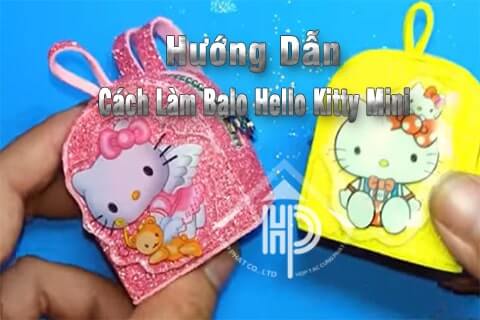
Besides purchasing a Hello Kitty backpack at shopping malls, markets, department stores, or having one custom-made at Hop Phat — you can also make a mini Hello Kitty backpack for your child right at home. With easy-to-find materials and a process that isn’t too difficult, you can even use the finished product just like a regular backpack. This is sure to be an incredibly meaningful gift that kids will absolutely adore. Let’s get started together with May Hop Phat!
Preparing Materials to Make a Mini Hello Kitty Backpack at Home
Materials you’ll need:
- A zipper approximately 10 cm in length.
- One sheet of glitter foam paper (EVA foam), A4 size.
- Hot glue gun, or 502 super glue.
- Pencil.
- Ruler.
- Scissors.
You might also need: A Collection of Student Backpack Models Made at Hop Phat Factory
Step-by-Step Guide: How to Make a Super Cute Mini Hello Kitty Backpack at Home
Once all materials are prepared, let’s make a mini Hello Kitty backpack for your child at home, following these super simple steps.
Step 1: Making the Zipper Strip for the Mini Hello Kitty Backpack
First, flip the foam sheet to its back side, then place the zipper flush against the edge of the foam, leaving approximately 3 mm of foam on each side of the zipper.
![[GUIDE] How to Make a Super Cute Mini Hello Kitty Backpack at Home](https://mayhopphat.com/wp-content/uploads/2026/02/place-zipper-on-back-side-of-foam-sheet.jpg "[GUIDE] How to Make a Super Cute Mini Hello Kitty Backpack at Home")
Then use a pencil to trace the outline around the zipper. Use scissors to cut out that rectangular piece of foam.
![[GUIDE] How to Make a Super Cute Mini Hello Kitty Backpack at Home](https://mayhopphat.com/wp-content/uploads/2026/02/trace-and-cut-rectangular-foam-piece-matching-zipper-dimensions.jpg "[GUIDE] How to Make a Super Cute Mini Hello Kitty Backpack at Home")
Next, place the zipper on top of the cut foam piece. Use a pencil to mark the zipper stop positions on the foam. Then draw two parallel lines following the marks, and connect them with two horizontal lines spaced approximately 8 mm apart.
![[GUIDE] How to Make a Super Cute Mini Hello Kitty Backpack at Home](https://mayhopphat.com/wp-content/uploads/2026/02/cut-out-small-rectangle-center-foam-piece.jpg "[GUIDE] How to Make a Super Cute Mini Hello Kitty Backpack at Home")
Fold the foam in half and make a small snip along the short marked line. Insert scissors through this cut to punch out the small inner rectangle.
![[GUIDE] How to Make a Super Cute Mini Hello Kitty Backpack at Home](https://mayhopphat.com/wp-content/uploads/2026/02/use-glue-to-attach-foam-and-zipper.jpg "[GUIDE] How to Make a Super Cute Mini Hello Kitty Backpack at Home")
Apply hot glue or 502 glue to the back of the foam piece — close to the inner edge and approximately 3–4 mm from the outer border. Then press the foam piece firmly onto the zipper, making sure the two zipper stop positions are completely hidden.
Step 2: Cutting the Front and Back Panels of the Backpack
![[GUIDE] How to Make a Super Cute Mini Hello Kitty Backpack at Home](https://mayhopphat.com/wp-content/uploads/2026/02/cut-two-foam-pieces-front-back-panels-backpack.jpg "[GUIDE] How to Make a Super Cute Mini Hello Kitty Backpack at Home")
Cut a template from regular cardboard measuring 5 × 4 cm, with the two upper corners trimmed into a rounded shape. Place the cardboard template on the back side of the foam sheet and trace around it with a pencil. Trace two shapes — one for each panel of the mini Hello Kitty backpack. Then cut out both traced shapes.
Step 3: Making the Top Handle of the Backpack
Fold the foam strip with the zipper in half and use scissors to make a small cut through the center fold.
![[GUIDE] How to Make a Super Cute Mini Hello Kitty Backpack at Home](https://mayhopphat.com/wp-content/uploads/2026/02/cut-small-hole-center-thread-top-handle.jpg "[GUIDE] How to Make a Super Cute Mini Hello Kitty Backpack at Home")
Then use a ruler and pencil to draw a strip on the foam approximately 2 mm wide and 6 cm long. Cut carefully along that straight line.
![[GUIDE] How to Make a Super Cute Mini Hello Kitty Backpack at Home](https://mayhopphat.com/wp-content/uploads/2026/02/making-top-carrying-handle-backpack.jpg "[GUIDE] How to Make a Super Cute Mini Hello Kitty Backpack at Home")
Fold the foam strip in half and thread both ends through the slit you cut at the zipper fold. Leave approximately 1 cm of each end sticking through, then apply glue to the back to secure the ends so they don’t slip out.
See more backpack styles: Top 5 Coolest Michael Kors Backpack Models — Hottest Picks 2021
Step 4: Making the Shoulder Straps to Attach to Both Sides of the Backpack
Use a ruler and pencil to draw two straight lines on the back of the foam sheet, each approximately 13 cm long and 1 cm wide. Cut to get two equal-length strips.
![[GUIDE] How to Make a Super Cute Mini Hello Kitty Backpack at Home](https://mayhopphat.com/wp-content/uploads/2026/02/cut-two-foam-strips-backpack-shoulder-straps.jpg "[GUIDE] How to Make a Super Cute Mini Hello Kitty Backpack at Home")
Place one of the foam backpack panels face-down on a cutting mat. Use a craft knife (box cutter) to make 3 horizontal slits — one longer slit near the top, and two shorter slits near the bottom.
![[GUIDE] How to Make a Super Cute Mini Hello Kitty Backpack at Home](https://mayhopphat.com/wp-content/uploads/2026/02/craft-knife-cut-3-horizontal-slits-back-panel-backpack.jpg "[GUIDE] How to Make a Super Cute Mini Hello Kitty Backpack at Home")
Then thread the two shoulder strap strips through the slits.
![[GUIDE] How to Make a Super Cute Mini Hello Kitty Backpack at Home](https://mayhopphat.com/wp-content/uploads/2026/02/threading-shoulder-strap-strips-through-backpack.jpg "[GUIDE] How to Make a Super Cute Mini Hello Kitty Backpack at Home")
Apply glue to secure the strap ends to the back panel of the large foam piece, and add a little extra glue at the upper contact slit.
![[GUIDE] How to Make a Super Cute Mini Hello Kitty Backpack at Home](https://mayhopphat.com/wp-content/uploads/2026/02/attaching-shoulder-straps-to-backpack.jpg "[GUIDE] How to Make a Super Cute Mini Hello Kitty Backpack at Home")
Then thread the remaining ends of both straps through the two lower slits and glue them in place to secure the straps to the back panel. Be sure to ensure both folded sections are equal in length so the shoulder straps hang evenly.
Step 5: Assembling the Backpack
![[GUIDE] How to Make a Super Cute Mini Hello Kitty Backpack at Home](https://mayhopphat.com/wp-content/uploads/2026/02/proceeding-to-assemble-backpack.jpg "[GUIDE] How to Make a Super Cute Mini Hello Kitty Backpack at Home")
Once the shoulder straps are complete, apply glue around the edges of the foam panel — leaving the bottom edge unglued for now. Then carefully press and attach the edge of this panel to the foam piece with the zipper. Since we’re using glue, it may take a moment to set. Hold the edges firmly together while pressing until they bond securely.
![[GUIDE] How to Make a Super Cute Mini Hello Kitty Backpack at Home](https://mayhopphat.com/wp-content/uploads/2026/02/attaching-front-panel-backpack.jpg "[GUIDE] How to Make a Super Cute Mini Hello Kitty Backpack at Home")
Next, apply glue around the border of the remaining foam panel. Similar to before, hold and press the edges together for a moment until the glue dries fully. Once attached, if there is any excess material sticking out at the bottom, use scissors to trim it so the base of the backpack is neat and flat.
Step 6: Making the Bottom of the Hello Kitty Backpack
![[GUIDE] How to Make a Super Cute Mini Hello Kitty Backpack at Home](https://mayhopphat.com/wp-content/uploads/2026/02/making-base-of-backpack.jpg "[GUIDE] How to Make a Super Cute Mini Hello Kitty Backpack at Home")
Apply glue to the bottom opening of the backpack, then cut a piece of foam slightly larger than the base size. Press this foam piece firmly onto the base of the backpack, holding it down until fully bonded. As always, if there is any excess foam sticking out, trim it away neatly to give the backpack a clean and charming look.
![[GUIDE] How to Make a Super Cute Mini Hello Kitty Backpack at Home](https://mayhopphat.com/wp-content/uploads/2026/02/attaching-hello-kitty-cat-motif-sticker-front.jpg "[GUIDE] How to Make a Super Cute Mini Hello Kitty Backpack at Home")
The mini Hello Kitty backpack is nearly complete! The final step is simply to take your Hello Kitty character motif cutout, apply glue to its back, and press it onto the front panel of the backpack.
![[GUIDE] How to Make a Super Cute Mini Hello Kitty Backpack at Home](https://mayhopphat.com/wp-content/uploads/2026/02/completed-mini-hello-kitty-backpack-cute-adorable.jpg "[GUIDE] How to Make a Super Cute Mini Hello Kitty Backpack at Home")
Look how lively and charming this little backpack turned out to be!
Browse more beautiful backpack styles at: Affordable Backpack Factory in Ho Chi Minh City
Closing Thoughts
And there you have it — we’ve just made a mini Hello Kitty backpack at home together with these incredibly simple steps! With the fairly detailed guide shared above, we’re confident you can complete your own Hello Kitty backpack to gift your little one — quickly and with ease. Wishing you every success!