

 Tiếng Việt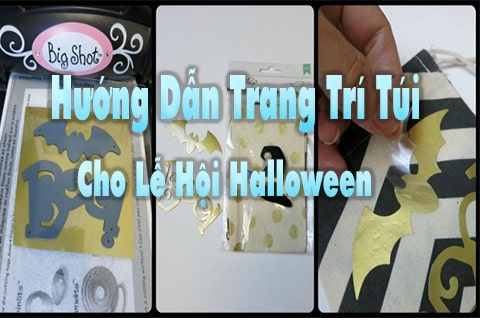
“Trick or Treat” — The Ultimate Guide to Decorating Your Halloween Candy Bag
“Trick or treat” is a must-do tradition on Halloween. You have to carry all that candy in some kind of bag — so why not decorate a bag or make your own super cool Halloween candy bag? One that is practical for holding candy, reusable, and still looks eye-catching and on-trend. May Hop Phat will guide you through making and decorating a candy bag for the upcoming Halloween holiday.
Guide to Processing and Decorating a Halloween Candy Bag
1. Decorating a Crossbody Bag for Candy
Materials Needed
Sewing and decorating a bag is always a fun artistic activity. Halloween is coming and you want your candy bag to stand out? You can use an old pillowcase or felt fabric and sew a basic bag — or even simpler, just use a plain canvas tote bag.

Lime Green Dye Mix:
- 2¼ teaspoons lemon yellow dye
- 1⅛ tablespoons aquamarine dye
- 1 cup hot water
Pumpkin Dye Mix:
- Tangerine Rit dye
- 1 cup hot water
Other Materials:
- DecoArt black fabric paint
- Paintbrush
- Buttons Galore
- Muslin or pillowcase fabric
- Black ribbon
Decoration Steps
- Cut the fabric to 18 inches × 36 inches and dye it in your chosen color following the package instructions.
- Wash, dry, and iron the fabric before decorating the bag.
- Hem the top edges of each end by folding ¼ inch and then ¼ inch again.
- Fold the material in half with right sides facing each other and sew the edges together.
- Sew on a ribbon strip or a shoulder strap of your choice.
- Insert a paper bag or a piece of wax paper inside and paint designs on both sides. Let the paint dry and reapply if needed.
- Add buttons or other decorations as desired.
2. Decorating a Canvas Bag for Candy
Materials Needed
For this bag decoration project, the materials are extremely simple. All you need is a plain black or white canvas tote bag, a quality fabric spray paint, a paper cutting template, wax paper, and a stencil with creepy Halloween details such as skeletons, skulls, or pumpkins — depending on your personal preference.
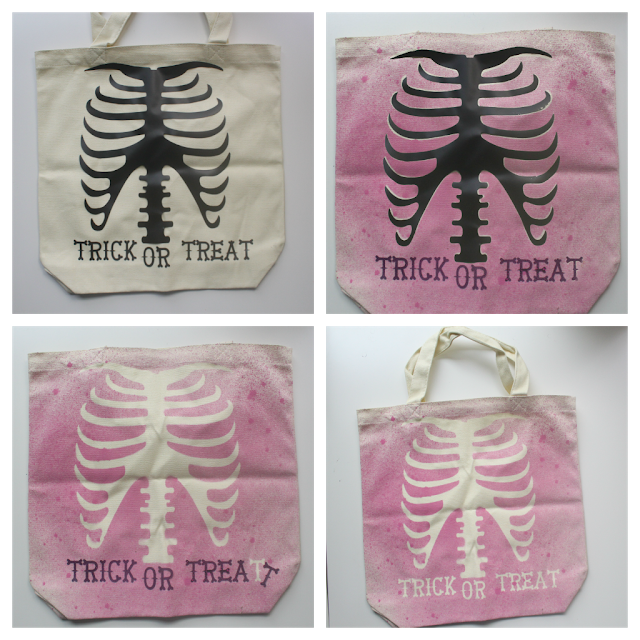
These plain canvas bags can be easily found at May Hop Phat, available in thick fabric at affordable prices with great quality.
Bag Decoration Steps
- Apply the stencil onto your canvas bag. You can cut your own stencil template or purchase one from a craft supply store.
- Place some newspaper inside the bag to prevent paint from bleeding through. Bring your canvas bag to a well-ventilated area so it can dry faster. Then spray fabric paint onto the canvas bag surface. Allow to dry according to the instructions on the can.
- Carefully peel off the wax paper stencil.
- Allow the fabric to dry for the time specified on the can. You can also mix two or three colors to add more variety to your bag’s design.
With just a few simple steps, you now have a wonderfully cute candy bag. These decorated bags can also be reused many times for outings, picnics, and more — making them a truly worthwhile project.
3. Decorating a Drawstring Candy Bag
Materials Needed
- Tulip soft fabric paint
- Vinyl plastic sheet
- Drawstring fabric bag
- Fabric wine bag

Decorating the Candy Corn Wine Bag
- Use tape to mask off the middle section of the bag. Brush on yellow fabric paint and let it dry for a few minutes. Use Tulip soft fabric paint as it does not dry too stiff — we need the bag to fold gently. Carefully remove the tape.
- Tape along the bottom edge of the yellow painted section. Paint the bottom of the bag with orange fabric paint. Remove the tape.
- Once the paint is dry, tie the top closed with the braided cord that comes with the bag.
Making a Cute Matching Mini Accessory Bag
- Cut different shapes from vinyl sheeting. May Hop Phat used a flying bat, the word “Boo,” and a witch’s hat.
- Place the cut vinyl shapes as desired onto the felt fabric bag. Cover the vinyl with a thin protective cloth and press with your iron on its highest setting. For best results, press the iron firmly over the vinyl for 20–30 seconds, then repeat.
- Wait for the vinyl to cool completely, then carefully peel off the protective backing from the vinyl.
- Fill each bag with snacks and tie the top closed with string.

These decoration designs are really simple, aren’t they? With just a few familiar materials and a little time, you can create super “spooky” Halloween candy bags in no time. These bag decoration ideas are not only for Halloween — you can also apply them regularly throughout the year.
Conclusion
May Hop Phat has now guided you through several Halloween candy bag decoration ideas. You can decorate your own bag or place a custom order for bags made to your specifications at the Hop Phat manufacturing workshop. Wishing you a fun-filled Halloween and lots of candy!